How to Wrap a Bouquet of Flowers DIY


The aesthetic appearance of the package plays a significant role. It is crucial when discussing creating an exquisite floral arrangement. Most often, you can buy a bouquet already with ready-made packaging. Or, you can come up with your flower wrapping ideas.
In the past, florists used only cellophane film to flower bouquet wrap. Now on the shelves of flower stores, we see a large variety of packaging made of environmentally friendly materials. With their help, florists (and you) can recreate any arrangement design. But how to do it?
Is it possible to wrap a bouquet like a professional florist? Yes! This article will tell you how to wrap a bouquet of flowers DIY. No one will even be able to know that you did it with your own hands and not someone with years of experience. So grab some wrapping paper and get started!
What You Will Need
Constructing a beautiful flower bouquet wrap is simple and easy. Here are the main items you will need to do this:
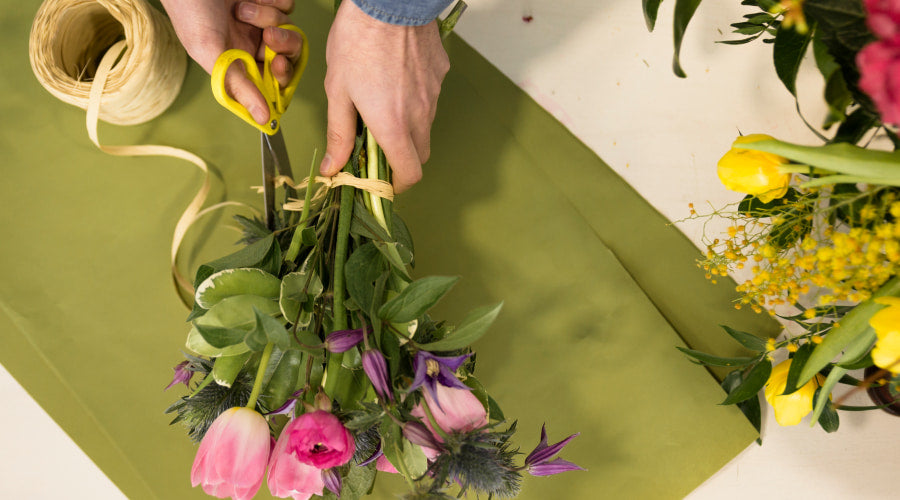
- Flowers;
- Shears/scissors;
- Floral tape;
- Tissue paper/wrapping paper;
- Ribbon;
- Floral pins.
Optionally, you may also need materials such as a bow or other decorations.
How to Wrap Flowers in a Paper

Once you have the right supplies, it's time to start wrapping! Before we start, we must inform you about the safety precautions. Be sure to use a suitable surface to create your flower bouquet wrap. Remember also that the scissors/shears are sharp, so be careful using them.
So, follow our simple instructions to learn how to wrap flowers in the paper. You'll be able to make each wrap in less than 20 minutes.

Cut Wrapping Paper to Size
Let's start with the most accessible and straightforward. You have a bouquet that needs to be wrapped. To wrap the flowers in tissue or other paper, you must measure and cut them.
To do this, take a pre-purchased bouquet of flowers and measure its circumference. Then add another small margin all around the circumference. Approximately you need to add 6 inches (15 cm). You need this to leave yourself some space. Once you have the correct dimensions, cut out the appropriate piece of wrapping paper. Set it aside and move on to step two of flower wrapping.

Set Flowers Diagonally
So, you have prepared the DIY wrapping for the bouquet. Now, take the bouquet of flowers and put it diagonally on the wrapping paper. You need to do this, so it does not look too bulky and incongruous.
Once you have placed the bouquet, check if everything is neat. Make sure that no folds form on the wrapping paper. Otherwise, it will ruin the appearance of the flower bouquet wrap.

Fold the Wrapping Paper Around the Bouquet
Now it's time to wrap your flower bouquet finally! To do this, you must fold the wrapping paper around the bouquet.
So, take one side of the paper and tuck it inside. Do this as if you were covering the bouquet with one side. Then, take the other side and do the same, only on top of the first side. Be sure to keep all sides straight. And, of course, be careful not to tear the paper.

Secure With Floral Tape
DIY bouquet wrapping is easy and beautiful. But to keep all this beauty from falling apart, you must secure it well. So, after wrapping the bouquet of flowers with tissue paper or wrapping paper, secure it with floral tape.
The floral tape will hold everything together and prevent the bouquet from falling apart. Wrap the bouquet tightly enough, so none of the stems are visible through the wrapping material.
You can wrap the stems with duct tape if you want a more secure attachment. Wrap floral tape on top of the tape.

Add Ribbon and Accessories
Have you secured your flower wrap with floral ribbon? Then it's time to move on to the decor. Add ribbon or twine to add a special touch. We recommend choosing the color of a ribbon under the package's color. That way, your bouquet will look even better.
You can also add a few extra embellishments. For example, you can take a bow or other decorations. They will give your flower wrapping an even more elegant look.

Finish Your Work With Floral Pins
The last step is to secure all the loose ends with floral pins. It ensures that nothing will slip out of place and the wrap will last longer. Insert the pins into the base of the wrapping material, and you're done! Now you have successfully wrapped a DIY flower bouquet!
Bottom Line
Congratulations on creating such a beautiful flower bouquet wrapper. Now you can bring it to a special event or gift it to someone special. Enjoy your beautiful creation!
But if you want to avoid making the bouquet yourself, you can always visit our website. Rosaholics will provide you with the perfect bouquet with the perfect packaging. You can choose absolutely any bouquet from our various categories.
Add your wish about Luxury Wrap. Our experienced team of florists will create any design you desire, from romantic to contemporary. Contact us today to learn more about our services.
We look forward to your order!
carrusel_1
FAQs
The best way to wrap flowers to keep them fresh is to use proper flower wrapping techniques.
Florists usually use tissue paper or wrapping paper to wrap flowers. However, you can also choose materials like burlap for a unique look.
When wrapping flowers, choosing paper that is the same color as the flower is best. It will create a more aesthetically pleasing look for your bouquet. But you can also use contrasting colors. It will make the bouquet stand out even more.
Yes, you can use parchment paper to wrap flowers. It will provide an extra layer of protection for your flower bouquet and help keep it fresh for longer.
To attach ribbon to a flower bouquet: Secure the end of the ribbon to the wrapping material with floral pins. Wrap the ribbon around the bouquet until you have achieved the desired look. Secure the ribbon with more floral pins, and your flower bouquet is ready for gifting!
Read Also:
Not seen your shipping location? We deliver US Nationwide, visit our Shop All collection to discover the perfect bouquet that best fit your occasion.

