How to Make a Corsage: The Ultimate Guide


Unleash your inner florist and master the art of creating beautiful corsages. Discover a world of floral possibilities. With a corsage, you can decorate the bride, prom queen or decorate your style. Get ready to immerse yourself in a tapestry of colors, aromas, and textures. We will embark on a journey that combines craftsmanship, creativity, and botanical magic. Walk with us from choosing the perfect flowers to skillfully arranging them. We will equip you with the knowledge and technique of creating corsages. Your creations will leave everyone spellbound. Find out about corsage making with our instructions. We are sure that you will enjoy the manufacturing process. And the result will not leave anyone around indifferent.
So, let's delve into this floral adventure and discover the secrets to creating beautiful corsages. They will indeed become a favorite symbol of elegance and beauty.
How to Make Wrist Corsages with Mini Roses
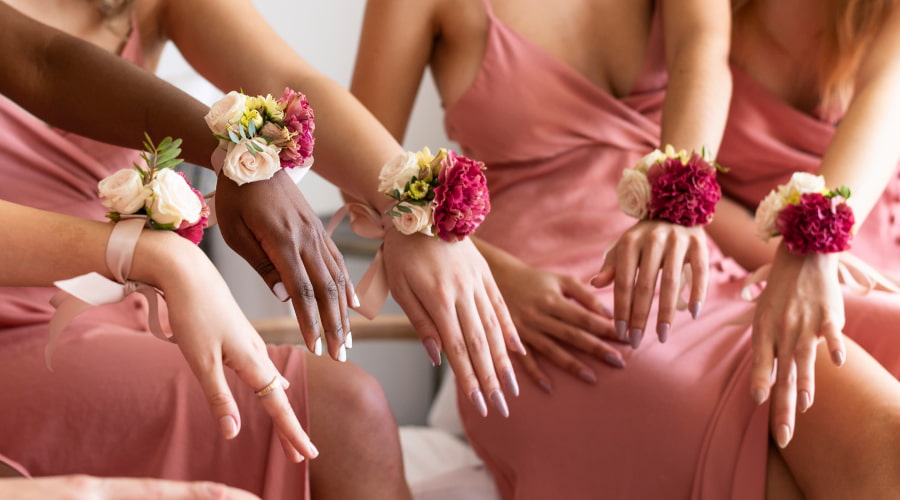
Opting for a rose-embellished wrist corsage is a compelling alternative to traditional bridesmaid bouquets. Such a corsage offers many undeniable advantages. With elegantly decorated hands, bridesmaids get more freedom. If the bride needs help, the absence of bulky bouquets allows her to help without hindrance. A friend can quickly fix a curly curl or raise a festive glass of champagne. In addition, freeing the hands of the bridesmaids allows them to complement the accessories. Experience the practicality and elegance of corsages on your wrist. It is comfortable, stylish, and harmonious. However, a corsage for the wrist can be used not only by bridesmaids. It can become an excellent accessory for the bride, at graduation, or for other festive events.
You can make a corsage diy for your wrist by following these steps:

Step #1: Prepare Your Mini Roses
Trim the stems of the mini roses to a length of about 1 to 2 inches. Remove any thorns or excess leaves from the stems.

Step #2: Create a Wire Base
Measure the floral wire around your wrist to determine the appropriate length. Add a few extra inches to secure the bodice. Cut the wire with a pair of pliers and form a circle from it. Leave the ends loose.

Step #3: Attach the Mini Roses
Press one mini rose to the wire base near one of the open ends. Secure it by wrapping floral tape around the stem and wire. Repeat this step with the rest of the mini roses. Place them evenly along the wire base. Leave some space at the open ends to allow for adjustment and closure.

Step #4: Add Greenery and Filler
Enhance the beauty of the corsage diy by adding small sprigs of greenery between the mini roses. Arrange them in a balanced and pleasing manner, and secure them in place with floral tape.

Step #5: Wrap the Wire Base with Ribbon
Take the ribbon and start by attaching it to one of the open ends of the wire base. Secure it with a small amount of hot glue or floral tape. Wrap the ribbon around the wire, covering the floral tape and creating a neat and polished look. Keep wrapping until you reach the other open end, and secure the ribbon.

Step #6: Finishing Touches
Trim any excess wire or ribbon that extends beyond the bodice. Adjust the placement of the mini roses and greenery as needed. Ensure a balanced and symmetrical arrangement. You can also add extra embellishments using hot glue.
Your wrist corsage with mini roses is now complete! Slip it onto your wrist, adjust the wire ends to fit comfortably, and secure them. Revel in the beauty of your handmade creation.
How to Make a Corsage with One, Two, or Three Roses
Creating a corsage with one, two, or three fresh roses is a versatile way to decorate any special occasion. Such a corsage is suitable for both a minimalist and more luxurious design. Step-by-step instructions will help you create a beautiful corsage with roses. However, before making a corsage, you must prepare the necessary materials.
You will need:
- Roses (preferably fresh),
- Floral ribbon,
- Floristic wire,
- Ribbon (preferably satin or organza),
- The greenery (such as leaves or ferns),
- Scissors,
- Wire cutters,
- Hot glue gun (optional).
After you have prepared everything, you can start a DIY corsage creating. To do this, take your time and follow the instructions.
The steps for creating a corsage with one, two, or three roses are similar to the previous ones but have their characteristics.
The following steps will help you achieve your goal:

Step #1: Prepare the Roses and Create a Wire Base
Trim the stems of the roses to a suitable length, leaving about 2 to 3 inches of stem. Remove any thorns or excess leaves from the branches.
Measure a floral wire around the wrist to determine the appropriate length. Cut the wire using wire cutters and shape it into a circle, leaving the ends unattached.

Step #2: Attach the Roses
For a corsage with one rose: Hold your chosen rose against the wire base near one of the open ends. Secure it by wrapping floral tape around the stem and the wire.
For a corsage with two roses: Position the roses on opposite sides of the wire base near the open ends. Secure each rose by wrapping floral tape around its stems and the wire base.
For a corsage with three roses: Arrange them in a triangular pattern, spacing them along the wire base. Hold each rose against the floor and secure them one by one with floral tape, making sure they are positioned.

Step #3: Make the Final Touches
Accent the corsage diy by adding sprigs of greenery or filler flowers between the roses. Secure the greenery in place with floral tape.
Take the ribbon and attach it to one of the open ends of the wire base. Secure it with a little hot glue or floral tape. Wrap the ribbon around the wire, creating a neat and sophisticated look.
Trim any excess wire or ribbon that extends beyond the bodice. If necessary, adjust the placement of the roses, greenery, and filler.
Your corsage with one, two, or three roses is now complete!
How to Use Corsage
How to use corsages elegantly and casually? A corsage is a fascinating accessory that adds a touch of sophistication to any formal event. The corsage can be worn on the wrist or pinned to the lapel. It can highlight your clothes and create an unforgettable fashion impression. Thanks to a beautiful corsage, you will radiate confidence and sophistication. To make everything great, coordinate the location of the celebration with your clothes. A good corsage can always help with this. Make the most of this exquisite accessory.
The way to use a corsage depends on the event you are going to. Choose the appropriate clothes and complement them with a corsage.
How to make a corsage for various formal events:
For Your Wedding
How to make a rose corsage for a wedding? Here's a brief guide:
- Choose the corsage style. Decide between a wrist corsage or a pinned corsage.
- Select the flowers. Choose flowers that complement your wedding theme and bouquet.
- Coordinate with the bridal party. Determine who will wear corsages. Coordinate the style and flowers with their attire.
- Communicate with your florist. Share your preferences and vision with your florist to create beautiful corsages.
- On the wedding day. Appropriately size and secure wrist corsages and pin corsages to lapels or dresses.
- Capture the memories. Have your photographer capture special moments with the corsages.
Using corsages at your wedding will add a touch of elegance and honor to your celebration.
For Your Prom
Using a corsage for your prom is a stylish and classic way to accessorize your attire. Here's a quick guide:
- Coordinate with your date. Decide on the color and style of the corsage to match your outfits.
- Choose the corsage style. Decide between a wrist corsage or a pinned corsage.
- Select the flowers. Choose flowers that complement your attire and personal preferences.
- Order or create the corsage. Purchase a corsage from a florist or make your own using flowers, ribbon, and floral tape.
- On prom day. Present the corsage to your date, or have them pin it on your dress or lapel.
- Wear and enjoy. Showcase your corsage throughout the prom night. Сherish the memories captured with it.
Using a corsage for your prom will elevate your ensemble. It adds a touch of sophistication and charm to your special evening.
Rosaholics Helps You to Choose Fresh Roses
If you want to know how to make wrist corsages or an accessory for a wedding, you need to start with choosing flowers. When it comes to choosing fresh roses, Rosaholics is your trusted partner. We are a rusted resource for choosing the freshest roses for any occasion. Thanks to their experience, you can confidently navigate the various roses options. Their quality commitment ensures you get bright, fragrant, and long-lasting roses. With Rosaholics, you get a great selection of beautiful roses for corsages. Let Rosaholics be your go-to place for choosing the roses to brighten any moment.
Specialists from the Rosaholics store will help you choose fresh roses. These flowers are ideal for creating a corsage. Contact Rosaholics and find your perfect variety.
FAQs
Popular flowers for corsages include roses, orchids, and carnations. The choice depends on personal preference and the overall aesthetic of the event.
The best color of roses for a corsage depends on the desired look and theme. Classic choices include red, white, and pink.
Making a corsage with your own hands can vary in difficulty depending on your skill level and the complexity of the design. It can be a fun and rewarding DIY project with some practice and guidance.
A DIY corsage can be more cost-effective compared to a purchased one. It eliminates the labor costs and markups associated with professional design.
Read Also:
How to Preserve a Rose: the Definitive Guide
How to Make Rose Potpourri at Home: DIY Guide
How To Make a Rose Cake
How to Frame Pressed Flowers?
Not seen your shipping location? We deliver US Nationwide, visit our Shop All collection to discover the perfect bouquet that best fit your occasion.
Copy and paste this code on your next purchase at Rosaholics
Never miss a great Rosaholics promotion, and so many more!

